This document explains how to perform a basic SQL backup and how to restore it from the Dashboard.
Prerequisite: the system account must have sysadmin rights to manage SQL databases.
Creating the Backup set
- Once logged in to https://dashboard.rg-supervision.com, go to the agent and click RG Backup and then click Manage

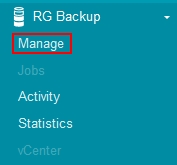
- The following screen appears, in which you select a backup policy:

- The following screen appears, in which you configure the different elements:
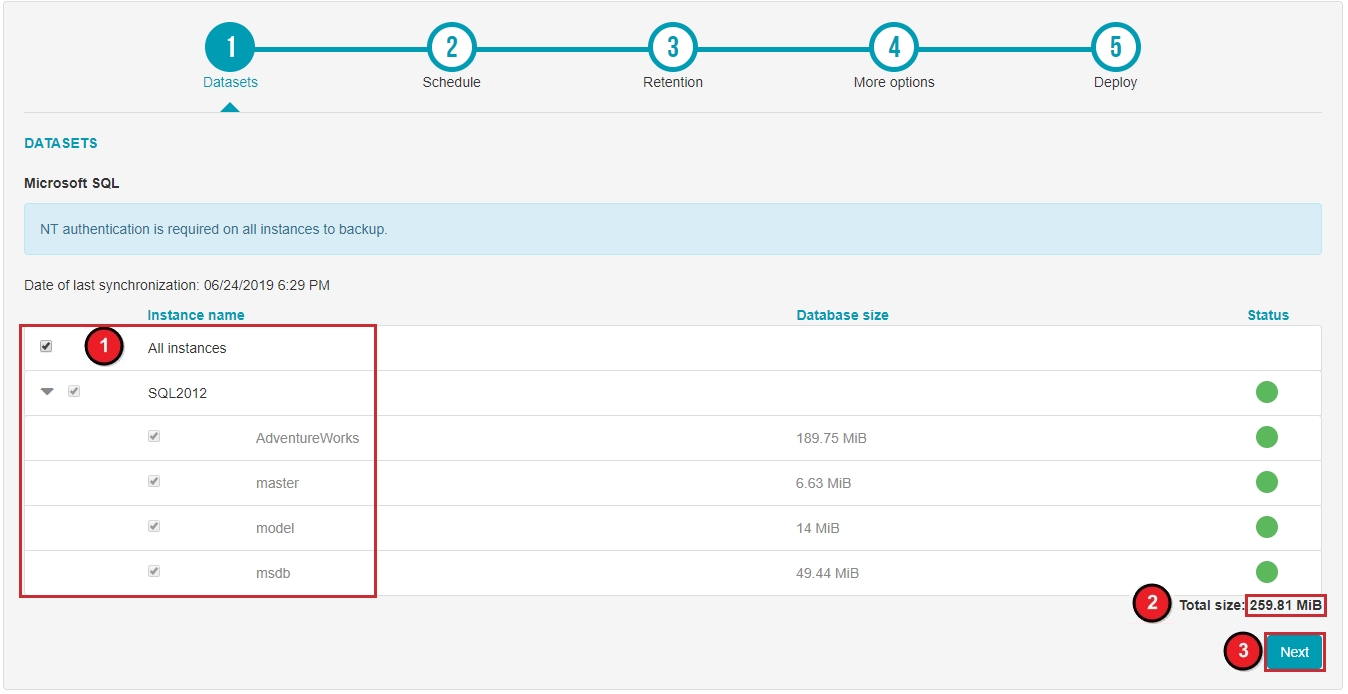
- Click the All instances box so that you back up all . If you do not check this box, nothing will be backed up
- In the Total size field, an estimation of the size of the selected databases is displayed
- Click Next to continue
- You are now in the configuration of the backup set schedule:

- Select a backup frequency: Daily, Weekly, Monthly or On demand. If you selected Daily, continue with the next step. If you selected Weekly or Monthly, see “Weekly and Monthly Backups” below for more details
- Choose the time that the backup will occur each day:

- An estimation of the size of the backup is displayed
- Click Next
Weekly and Monthly Backups
If you selected the Weekly frequency, you are prompted to select a day on which to run the backup

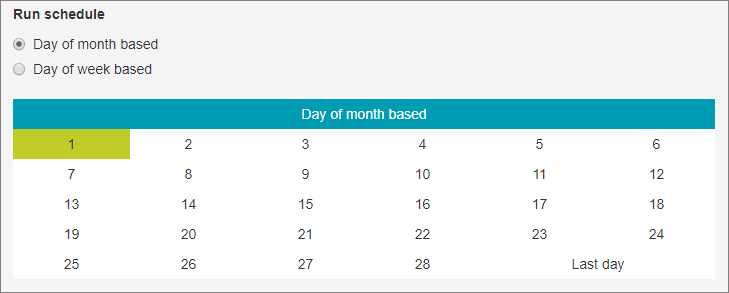
If you selected the Monthly frequency, you are prompted to select Day of month based or Day of week based
- If you selected Day of month based, select a day of the month on which to run the backup:
-
- If you selected Day of week based, From the dropdown menu, select the appropriate descriptor for the week, then click the day of the week on which to run the backup:

-

- The following screen appears, in which you set the backup retention parameters:
-

- Retention period: Select, from the dropdown menus, the number of days, weeks, months, or years for which to store the backup data
- Advanced retention : Turn Advanced retention On or Off. If On, select retention periods for the specified backups for the amount of time specified from the dropdown menus
Note: when you turn the advanced retention option On, the standard Retention Period menu is grayed out but is still valid - Keep at least N backups: Turn this On to keep a specific number of backups even after the chosen retention period has ended.
- Click Next to continue
- Select the Storage location from the dropdown menu and click Next:

- The Deployment screen appears, displaying a summary of the configuration details you have selected for the backup set:
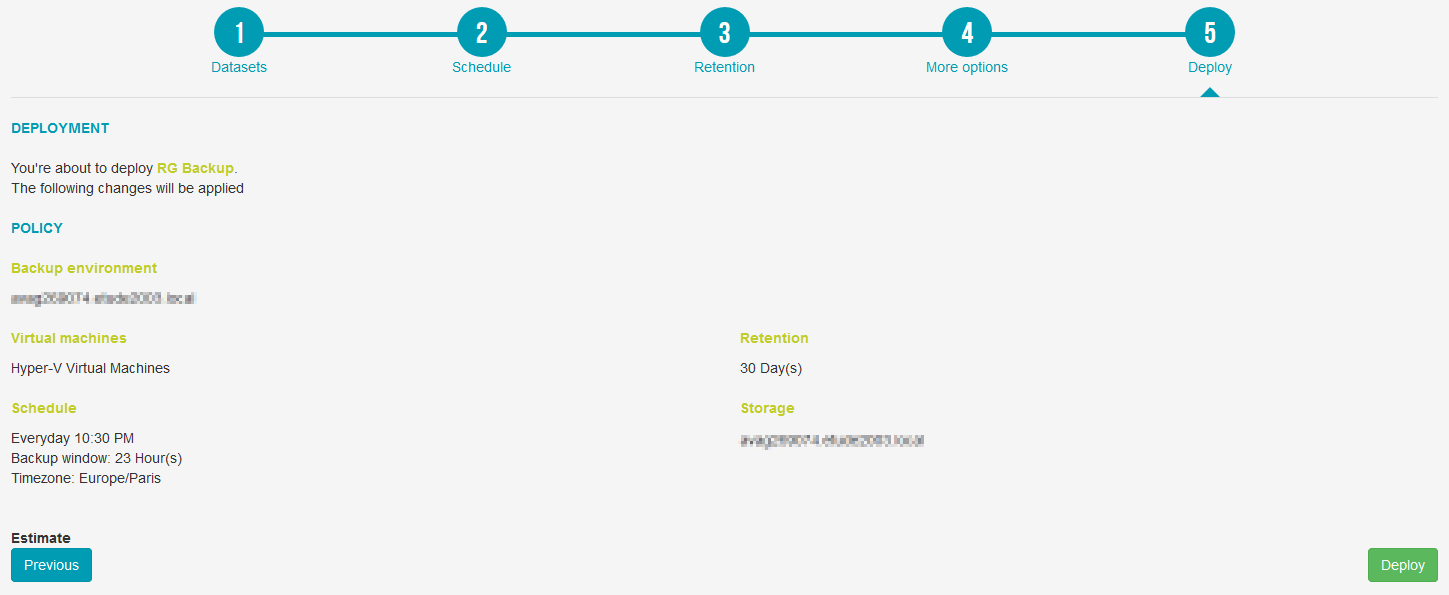
- Click Deploy to send the backup configuration to the agent.
Restoring SQL databases
- To launch a SQL recovery, go to the agent and click RG Backup and then click Manage
- Next, click the Actions dropdown menu and select Microsoft SQL Restore

- The following screen appears, from which you will be able to choose what you want to recover and where it will be restored
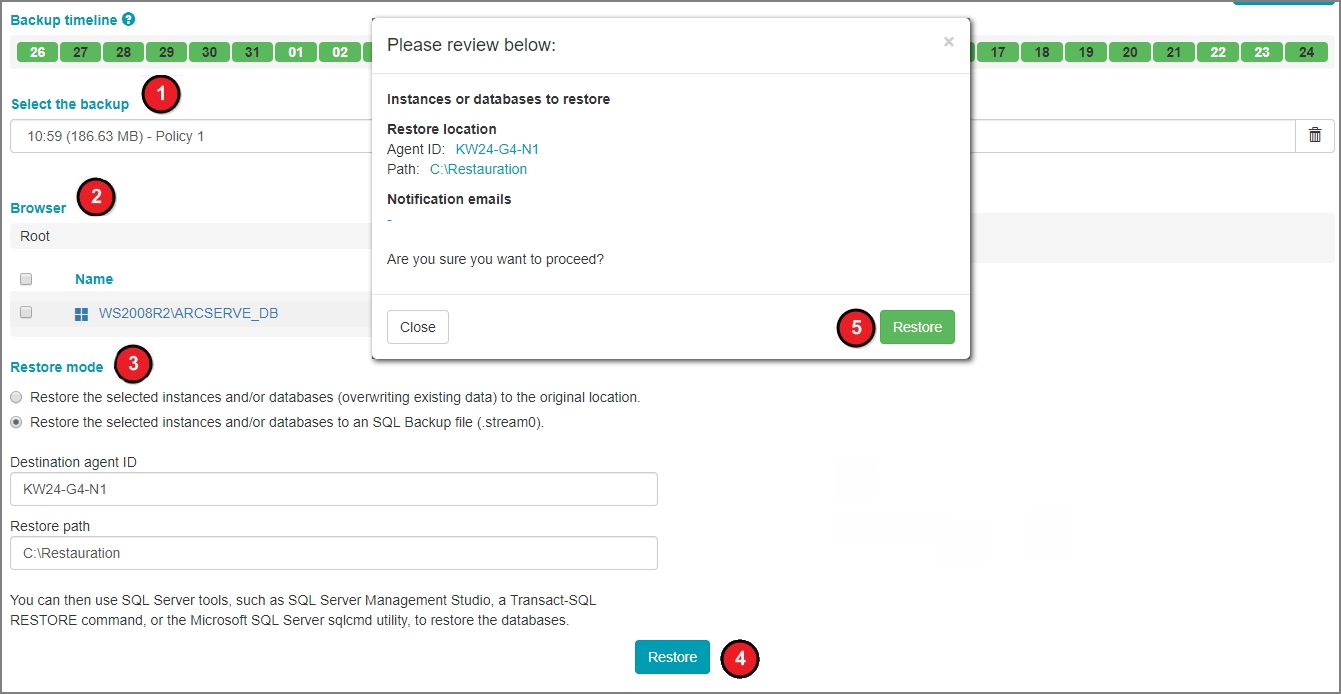
- Backup Timeline : This status bar describes the different states of a backup.
The number in each box represents a day of the month. Thus, the timeline describes one month of backup history. You can display the legend shown below by clicking on on the right of « Backup timeline » title, which indicates what backup activity occurred on each day.
- Select the Backup: Select the backup set from the dropdown menu
- Browser: Select from the list of the databases you can restore

- Restore mode: This field indicates where the backup will be restored to. Select either Restore the selected instances and/or databases (overwriting existing data) to the original location, or Restore the selected instances and/or databases to an SQL Backup file (stream). If you select Restore the selected instances and/or databases to an SQL Backup file (stream), type a Destination agent ID and a Restore path in the boxes
- Click Restore to start the recovery
- Please review below: This screen displays confirmation of the selected backup parameters before recovery actually begins. Click Restore to start the recovery